
We all get junk mail. Instead of tossing it out, how about up-cycling it into something you can use? Do your part to save a tree. Some interesting numbers from the University of Southern Indiana in Evansville say that approximately 1 billion trees’ worth of paper is thrown away every year in the US. And, the average household throws away 13,000 separate pieces of paper per year. Wow!
I think turning a junk mail booklet into a journal is the perfect project. Journaling serves many purposes; it gets your thoughts down, keeps you organized, provides a creative outlet, and more. You could use a journal to keep a list of who you want to write letters to! Also, I want (and need) somewhere I can practice different mixed media techniques; you know, try out different paints, inks, papers, stamps, stencils. . .
So, I grabbed a booklet from the stack of mail on our counter, and began. I thought I’d take some pictures along the way so you can watch my “journal journey”. I’m open to suggestions and tips, and maybe you’ll pick up some bit of inspiration along the way, probably learning from what I do wrong! I’m new at this, so be kind.
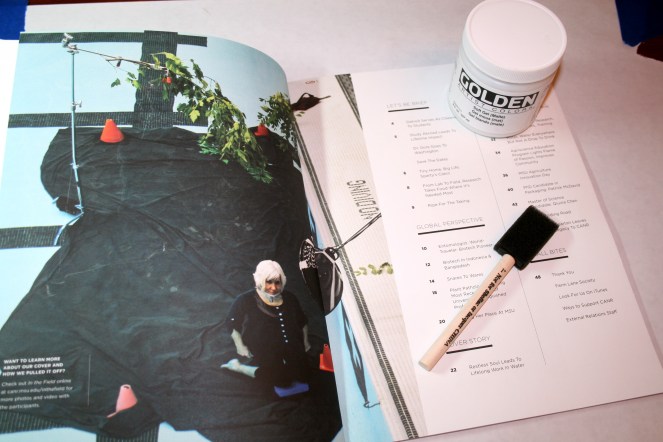
Here is what I started with:
Not much to look at, but it has a nice heavy cover. The pages weren’t really thick enough, so to begin I glued two pages together:
I say “glued”, but I used gel medium. I just put the gel medium around the edges and stuck them together. Lesson learned; make sure to put the gel medium all over, and be extra careful to make sure you get it nice and smooth. I had a lot of “bumps” on my pages. Another lesson; make sure to clean the lid and the jar of your gel medium before you put the top back on – almost impossible to get it open if you don’t.
After that dried, I put two coats of plain, old, cheap, white acrylic paint on, mainly to hide the print and pictures on the pages:
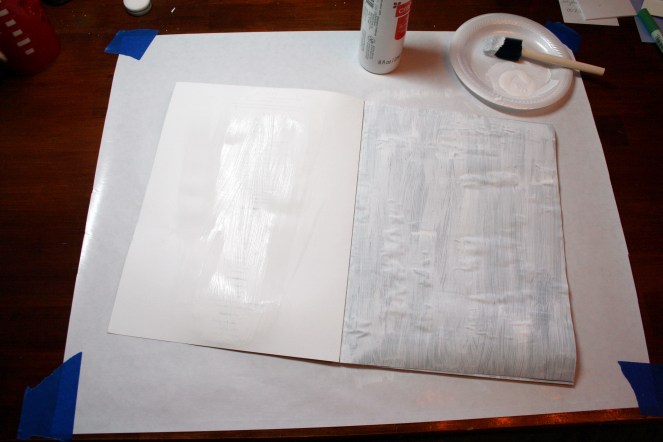
See how bumpy the right page is? That’s the one I glued. Better luck next time I guess. Also, see my fancy work mat? I know you can spend lots of money on this, but what I use is a sheet of freezer paper torn off from a huge role I bought at Sam’s Club months ago, held down by blue tape. Works perfectly! See my fancy brush and pallet?!
Next, after the two coats of white paint were completely dry, I put on a layer of clear gesso. I don’t have a picture for that, but after the paint and gesso, I had a nice surface to work with. Did I need the gesso? I don’t know! But, it does make me feel like an artist, because it seems like artists are always using gesso. And, I like the texture it gives you. And, while it was drying I had time to make and send a thank you card.
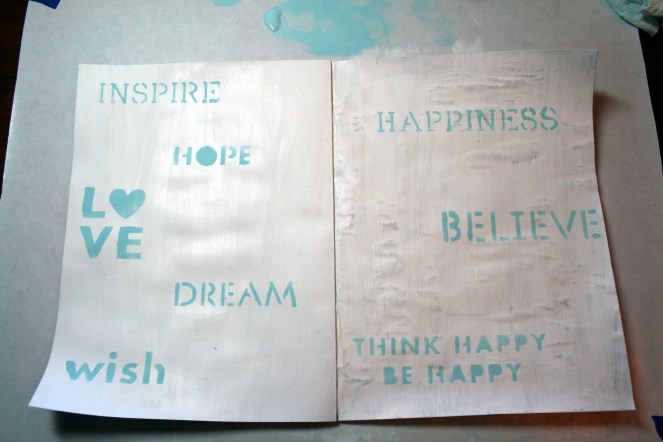
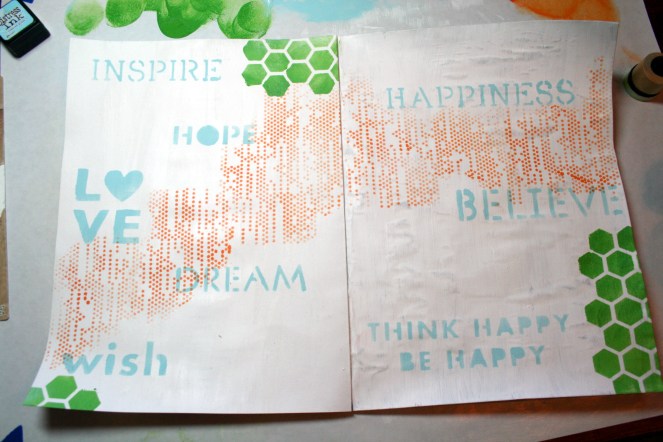
Finally, I started to add some color. First, I used a spa blue acrylic paint, nothing fancy, and stenciled on some words, using a stencil I bought at Wal-Mart, for next to nothing:
Now, I do watch Tim Holtz videos and try to learn new techniques. So, I learned that you should squeeze a blob of paint onto your work surface and then just pick up a little bit with a blending tool:
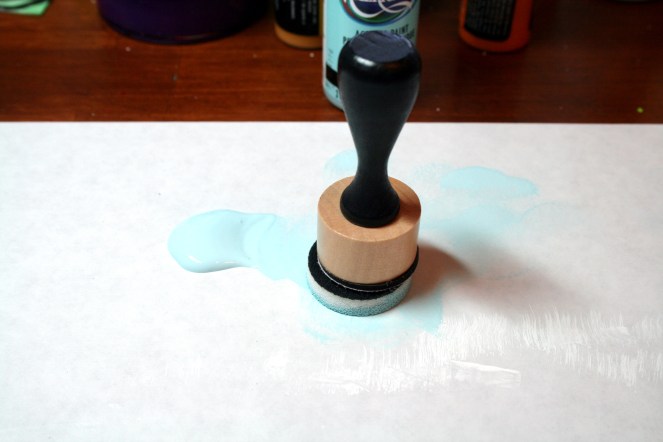
That way you don’t get too much paint on your “paint applicator”, and it doesn’t seep under the stencil. However, if you’re like me, you get a bit impatient and try a little more paint at a time. You can see some of my words are a little blurry. Guess I should listen to Tim.
After the blue words were completely dry, a MUST, I stenciled on some dots with spiced marmalade, an actual Ranger distress paint. And, I stenciled on a little bit of a honeycomb pattern with Ranger mowed lawn distress paint, making sure everything was completely dry in between colors:
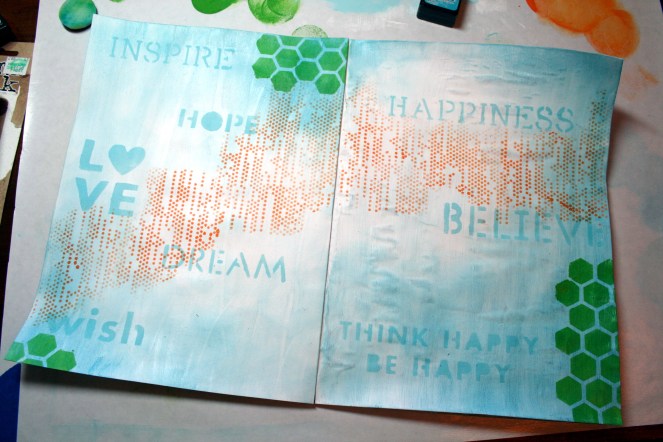
Next, I swirled on some broken china Ranger distress ink, sort of all over, making it darkest around the honeycomb pattern. What’s neat about using ink on top of paint is that the acrylic paint resists the ink, so that your painted colors stay true. I love that!
After a few black circles with a jar lid and paint, a little bit of a stamped border, and some stamped butterflies, ta-da!
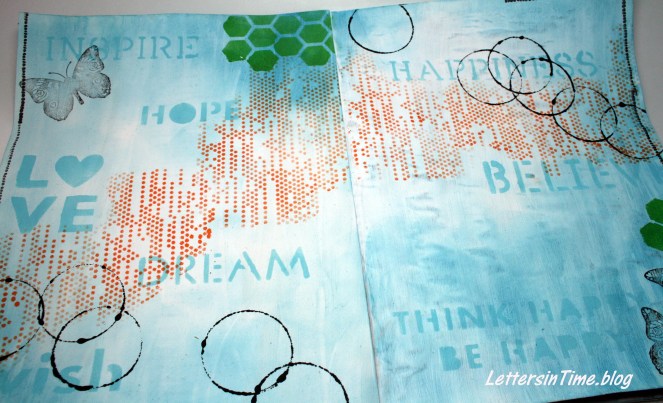
I’m never quite sure when to stop, but for these pages, this is it. I’m happy with the overall look, and I left myself some room to journal. I think I might add a few photographs, too. The only thing I don’t like are the bumps on the right hand side. I’ll have to work on that. I’m hoping that by the time I am all done with the journal, I’ll know what I’m doing. I should have started at the back; then when I’m done the first few pages would look spectacular!
More pages to come. Happy journaling!
